Server
Goal
The goal of the server.ts file is to set up all configurations necessary for hosting the backend
of An Scéalaí. Running this file sets up a server at a given port so that the frontend of the
application can make calls to it accordingly.
Current Setup
The server can be found at AnScealai/api/server.ts. This server is set up using Express[^1] and can be run using Node.js. After installing any dependencies[^2] with the npm install command, the server can be started by running npm run start. (Sometimes failing tests can cause errors when running the server like this, but we can ignore this issue by running npm run start:nocheck instead).
The server can be configured and run in different ways depending on the system environment[^3]. Certain variables or functionalities need to be set in order to run in the given environment. For example, when developing An Scéalaí locally (development mode), all routing and hosting occurs using localhost, which means ‘/localhost’ is included in any request URLs. When hosting An Scéealaí on the Abair server (production mode), these URLs need to be changed to contain the actual routes necessary to the hosted DB and other endpoints. Several scripts on the server can be run during deployment to make these changes in server.ts before hosting the code in production mode.
These modes are currently used in the server by setting the NODE_ENV variable:
- prod: used for production
- test: used for testing purposes
- fudge: used for testing fake users
- debug: used for debugging purposes
These environments can be set when running the server.ts file. For example, to run the
server file in production mode, execute the following command (or simply npm run start:prod as defined in package.json()): node DB=an-scealai PORT=4000 NODE_ENV=prod ts-node --transpile-only server.ts
Usage
The server.ts file contains many different processes to start the server. This section explains each block of code in the file and how the parts work together to host the backend application.
Imports
The file begins by importing any required Node.js modules[^4]. These are either built-in modules that Node.js provides, or they are our own modules imported from elsewhere in the backend. Modules are either assigned to a variable so they can be referenced later, or they are simply imported using the require() keyword. Below is a description of what these modules are used for:
-
./keys/loadand./keys/dev/load: These modules contain the keys necessary for JWT authorization. The first module is for production mode and the second is for any other mode. (Currently both of these modules are the same, there is no difference in these files) -
./logger: The logger is used to log any error or success messages as they occur during the processes of the backend. These messages are helpful for debugging -
express: This module contains the majority of the functionality for setting up the server and hosting the routing endpoints -
express-session: This module is session middleware for express. -
path: This module allows getting the path of a certain file or directory -
body-parser: This module parses incoming request bodies before sending to the handlers -
cors: This module eases browser security for requests. It is necessary for development to avoid Cross-Origin issues[^5]. -
mongoose: This module is a MongoDB object modelling tool used to create schemas for objects in the DB. It is also used to read and write data to Mongo from the backend[^6] -
passport: This module is used for authenticating users when they log in. It contains the functionality for password checking in the DB[^7] -
axios: This module is used for making HTTP requests -
./utils/errorHandler: This module contains code for handling and returning custom error messages -
./utils/jwtAuthMw: This module imports and configures the express-jwt module, which provides Express middleware for validating JWTs (JSON Web Tokens) -
./utils/dbUrl: This module contains the connection information necessary for running the database. It gets this data either from the current session environment (production mode) or from ../DB.js (other modes) -
./config/passport: This module imports the custom configuration for the passport module. -
expressQueue: This module limits the number of simultaneously processing requests for express by using queue[^8] The server file then needs to import the different routes that the front-end calls to send and receive data. Generally the routes are organised by collection or object type in the database. For example, if you want to read/write story objects, you make a call to the story route, which contains all the endpoints necessary for modifying story objects in the DB. The routes are stored in a routes folder located at AnScealai/api/routes. The following routes are currently imported into the file: -
Story: This route contains endpoints for reading/writing student stories
-
User: This route contains endpoints for reading/writing users
-
TeacherCode: This route contains endpoints for reading/writing the codes associated with teacher classrooms
-
Classroom: This route contains endpoints for reading/writing classrooms
-
Chatbot: This route contains endpoints for reading/writing Taidgín chatbot content
-
Engagement: This route contains endpoints for reading/writing website engagement objects, such as logs of how users interact with the different features on the site (logging in, writing stories, using the synthesiser, etc.)
-
Stats: This route contains endpoints for reading/writing certain statistics for the admin dashboard
-
Profile: This route contains endpoints for reading/writing user information profiles
-
Messages: This route contains endpoints for reading/writing message objects
-
Recording: This route contains endpoints for reading/writing student recordings of their stories
-
Grammar_log: This route contains endpoints for reading/writing grammar processing objects. Requests to these endpoints are queued using the expressQueue module.
-
Synthesis: This route contains functions for making calls to the Abair synthesis
-
Nlp: This route contains a function to make endpoints for nlp processing functions
- Originally all endpoints were contained within these routing files. We have now started to
migrate the endpoints in these files into new folders at
AnScealai/api/endpoints_functions. These routing files above still serve to
make endpoints from the endpoints in these new folders by using the
makeEndpoints()function in ../utils/makeEndpoints.[^9]
Database Configuration
The server then configures certain Mongoose properties. See Mongoose documentation for the details.

The function prodConnection() is then defined for setting up the MongoDB database
connection in production mode. This function is then called if the current session is not in
test mode. The function defines certain configuration options for the database and then
passes this config along with the appropriate connection url (as defined in the ./utils/dbUrl
module) into the mongoose connect() function.
Express Configuration
An Express server is then created by calling express(). This is conventionally assigned to a
variable named app. The server configures certain modules and routes by using the use()
function. This function takes in a path and a callback in its parameters and uses them to
“mount the specified middleware function or functions at the specified path. The middleware
function is executed when the base of the requested path matches the path”[^10]. These
different uses are defined so the server knows what to execute and where. Below are the
different configurations set up in server.ts. They are not necessarily in the order that they
appear in the code but are instead grouped by functionality.
Usage depending on environment:
-
app.use((req,res,next)=>{console.log(req.url); next();})If the environment is in debug mode, any request urls should be logged to the console -
app.get('/user/fudgeVerification/:username'...): If the environment is in Fudge mode (i.e. we are testing certain functionality so we need to make up a verified user without having to go and verify an email). This is actually aget()function that gets a fudged user from the DB and updates its username and status
Usage for configuring imported modules:
app.use(session): Uses the session module to set up an express session.app.use(/whoami): Configures the JWT keys imported from the jwtAuthMw moduleapp.use(bodyParser.json()): Configures the body-parser moduleapp.use(cors): Configures the cors moduleapp.use(errorHandle): Configures the errorHandler moduleapp.use(passport.initialize()): Configures and initialises the passport moduleapp.use(require('cookie-parser')('big secret')): Imports and configures the cookie-parser module which manages request cookies
Usage for configuring endpoint routes:
-
app.use(/version)Configures the current version using the version route (not previously imported with the other routes as it is imported within this function) -
app.use('/user', userRoute)Routes the request to the user routing file when the request URL contains ‘/user’ This configuration is the same for all the routes previously defined (story, user, classroom, etc.), so they won’t be repeated here. See code for details.
Usage for configuring a proxy:
app.use(/proxy, ...)Any endpoints that contain ‘/proxy’ in the URL are passed to this middleware function: This function creates a functionallowURL()that lists a set of URLs that are allowed to be requested. These are URLs for the Abair phonetics server, the synthesiser, the grammar checker and Teanglann dictionary Any URL passed into this function is tested against the regex expression containing allowed URLs. It returns true or false based on whether or not the URL is allowed[^11] If the URL is allowed, the request is carried out using the axios module to make a HTTP request. The request response is returned, and if any errors occur they are logged and returned
Usage for starting the server:
The server is finally started by calling the listen() function. This function takes in a port
number that is used for hosting. The server is only started if the system environment is not in
test mode. You can verify that the server is running with no errors by seeing if the message
‘Listening on port’ defined by the logger is logged in the console.
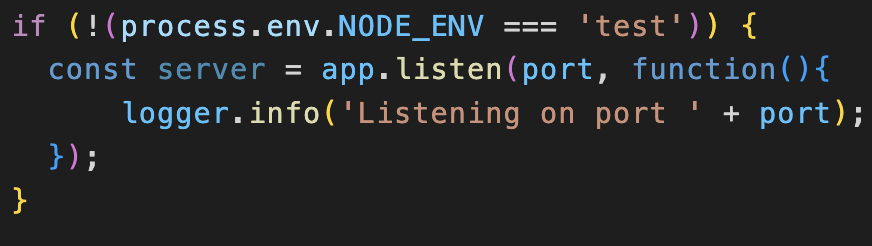
Block of code for starting the server, end of server.ts file after everything is configured